D.Balok multimedia design portfolio
Tuesday, January 11, 2011
FLASH:motion tween
I made a boat sailing and an airplane flying. To start off i changed the background color to light blue. Then i used the rectangle tool to make dark blue water for the boat. Next i created a boat using the rectangle tool and drew a red sail using the paint brush. Then i made white clouds using the paintbrush and made a plane using the rectangle and changing the color to grey. Lastly in every frame i selected the boat and plane and moved them in every frame. Therefore creating a motion tween.
Thursday, January 6, 2011
Flash:shape tween
To start my animation, i first set up my keyframes. I set them up at 1,20,40 and 50. In the first frame i changed the background color to a bright green. Then i added another layer so I would be able to to move texts and shapes. Then in the first keyframe I wrote my name and placed two rectangles on the corners. Then right clicking on that frame I inserted a shape tween. Then in the 20th frame I moved the text and inserted two polystar shapes in the opposite corner of the rectangles and inserted another shape tween. In the 40th frame i moved the text again and placed two ovals in the same spots the rectangles were in the 1st one and inserted another shape tween. Lastly, the 50th frame. I moved the txt once more and inserted two polystars, a smiley face and the word bam.
Wednesday, October 27, 2010
Photoshop_Layer Mask
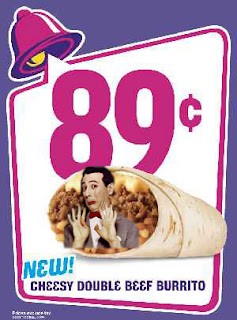
Creating a Layer Mask. To create a layer mask you will need to select two photos to photoshop. First, resize the image to the desired sizes needed. Then drag one photo on to the other. Next,Using the history brush erase away parts of the image you do not want shown. Lastly, Using the blur tool, blur edges to make the photo look like it was made that way.
Photoshop_Combo
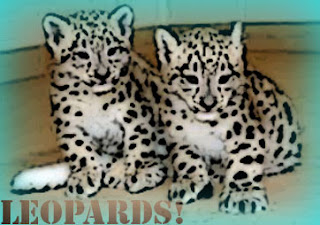
This is a Combonation. To make a combo you first select and image, for example I selected Leopards. Then using the filter located on your tool bar, select a type of filter, and it will change the look of your photo. Next, I feathered the image, I did so by Using the Rectangle Marquee tool and draging a box over the image. Then click select inverse, then making another layer and dragging it to the bottom i drew a rectangle over the picture with the desired color. Next, going back to the image with the leopards i selected edit cut. Lastly, Using the text tool i typed desired words. The image above is result of all the information just given.
Phototshop_ Magnetic lasso
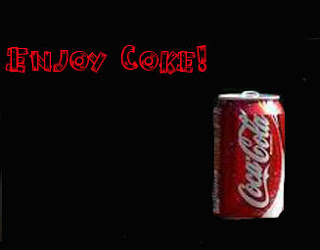 The image above is a magnetic lasso image. First to get this, you must upload desired picture to photoshop. For example, the coke cola can. Next, Using the magnetic lasso tool drag the lasso around the coke can. Then, making another layer, make sure you drag it to the bottom again, Choose a color and using the rectangle tool drag a box over the image. Then, go to the layer with the image and select cut. Then you will have the image above and just add text. You can add text by selecting the text tool and typing your desired text. Finally you will have the image above!
Photoshop_ Feather
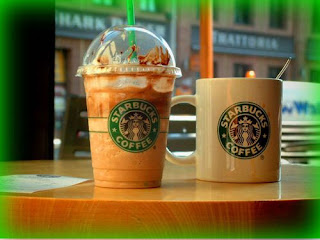
The image to the right is a feathered image.
First, To get a feather image is to choose a picture and open it on to your photoshop screen. Next, Add a layer and slide it underneath the background layer, make sure you rename each layer so it is not locked. Then, Using the Rectangular Marquee tool, draw a box over the whole image. After, go to select on your tool bar and select inverse. Then, click on your bottom layer and select the rectangle tool, and your desired color, draw a box over the image. Lastly, click on the layer that the image is on and click edit, cut and you will have your feather image as seen next to you.
Thursday, October 14, 2010
BALOK_Flyer
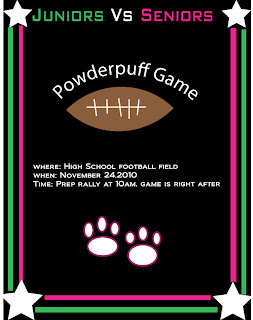
First I choose what topic I was doing my flyer on. Then I used the rectengle tool and made a black rectengle as the background. Next, I made a brown football by using the arc tool and then making lines to create the football. After that i then used the arc tool and created an arch, then on the arch I wrote Powderpuff Game. Next, using the typing tool i typed Juniors vs Seniors and colored the Juinors a bright green, the vs white, and the Seniors bright pink and changed the font size and style. Then under the football I typed the inmportant information needed, in easy to read font and simple to show it is the most important area on the page. Using the shape tool I created four white stars and put them on each corner to give the flyer appeal. Connected to the stars I used three bright green rectengles and three bright pink rectangles connected to the stars. Lastly, Using the shape tool I made two paws, in each paw I used four ellipses and placed each to make a paw. Then I changed the color of the paws to white and the line color to maroon, and the stroke to 4pt to make the paws stand out better.
Subscribe to:
Comments (Atom)